Front Door Exterior Handle: Service and Repair
Door Outside Handle Replacement
Removal Procedure
1. Remove the trim panel.
2. Remove the water deflector.
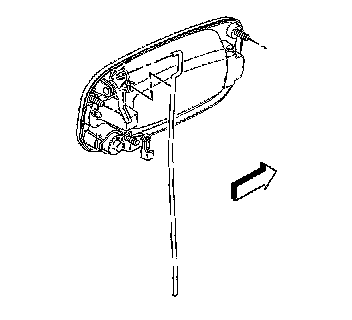
3. Remove the outside handle rod from the rod clip.
4. Remove the lock cylinder rod from the rod clip.
5. Apply masking tape across the door handle on the outside of the door to secure handle while removing the nuts.
6. Remove the outside handle mounting nuts.

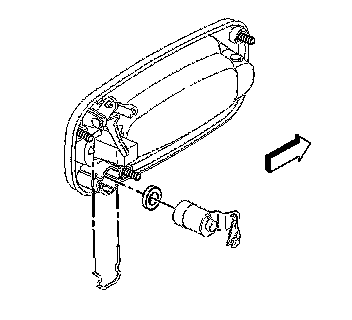
7. Remove the rubber cover in order to gain access to the outboard nut.
8. Remove the door lock cylinder from the outside handle housing.
In order to repair a binding lock cylinder, refer to Lock Cylinder Binding.
9. Remove the handle.
Installation Procedure
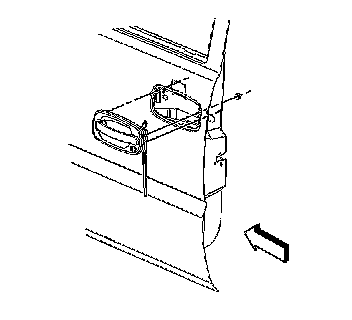
1. Install the handle to the vehicle.
2. If the lock cylinder is a replacement, apply a coating of GM P/N 12345120 or Canadian P/N 726548 or a similar lubricant to the inside of the lock case and the cylinder keyway.
3. Install the door lock cylinder to the outside handle housing.
In order to code a new lock cylinder. Refer to Key and Lock Cylinder Coding.
4. Install the lock cylinder clip to the lock cylinder rod.
5. Install the handle rod to the handle assembly clip.
6. Remove masking tape from door handle.
Notice: Refer to Fastener Notice in Service Precautions.
7. Install the outside handle mounting nuts.
Tighten the nuts to 9 N.m (80 lb in).
8. Install the rubber cover.
9. Install the water deflector.
10. Install the trim panel.