Brake Caliper Replacement - Rear (Except 35 Series)
Brake Caliper Replacement - Rear (Except 35 Series)Removal Procedure
1. Inspect the fluid level in the brake master cylinder reservoir.
2. If the brake fluid level is midway between the maximum-full point and the minimum allowable level, no brake fluid needs to be removed from the reservoir before proceeding.
3. If the brake fluid level is higher than midway between the maximum-full point and the minimum allowable level, remove brake fluid to the midway point before proceeding.
4. Raise and support the vehicle. Refer to Vehicle Lifting.
5. Remove the tire and wheel assembly.
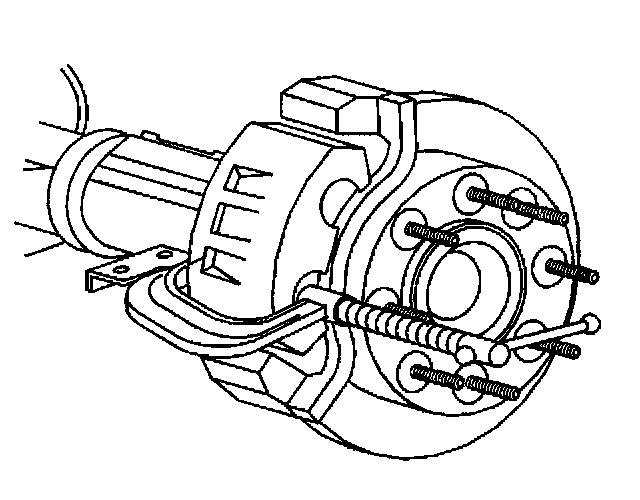
6. Compress the brake caliper piston.
^ Install a large C-clamp over the top of the caliper housing and against the back of the outboard pad.
^ Slowly tighten the C-clamp until the piston is pushed completely into the caliper bore.
^ Remove the C-clamp from the caliper.
7. Clean all dirt and foreign material from the brake hose end.
Important: Install a rubber cap or plug to the exposed brake pipe fitting end to prevent brake fluid loss and contamination.
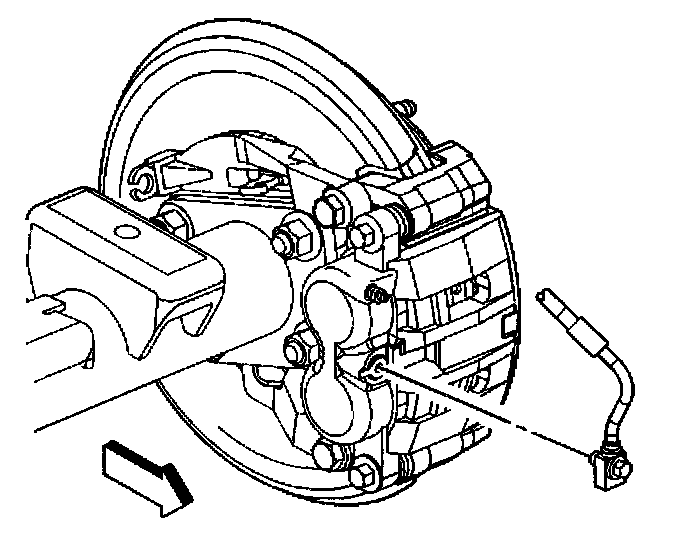
8. Remove the brake hose to caliper bolt from the brake caliper.
9. Remove the brake hose from the caliper.
10. Remove and discard the 2 copper brake hose gaskets. These gaskets may be stuck to the brake caliper and/or the brake hose end.

11. Remove the caliper guide pin bolts (15 series pickups).
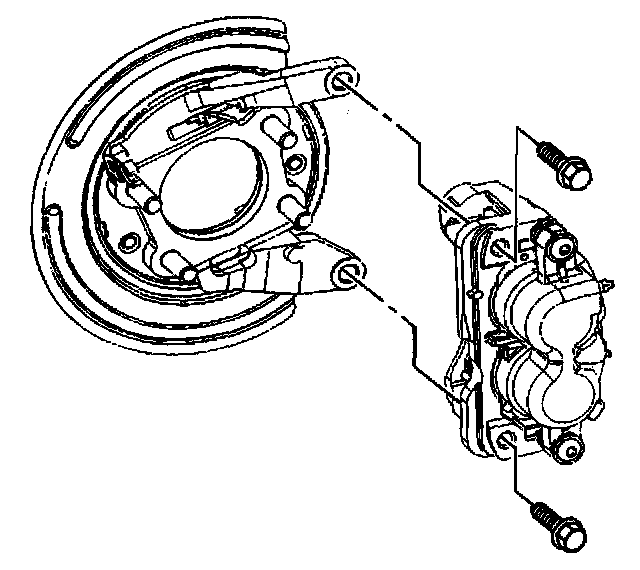
12. Remove the caliper guide pin bolts (15/25 series utilities, 25/35 series pickups).
Caution: Do not depress the brake pedal with the brake rotors/calipers and/or the brake drums removed. Damage to the brake system may result. if brake system damage occurs and is not repaired, vehicle damage and/or personal injury or death may result.
13. Remove the brake caliper from the vehicle.
14. Inspect the caliper assembly.
Installation Procedure
Important: Use denatured alcohol to clean the outside surface of caliper boot before installing new brake pads.

1. If you are installing new brake pads, use a C-clamp in order to compress the piston to the bottom of the caliper bore. Use the old brake pad, a metal plate or a wooden block across the face of the piston in order to protect the piston and the caliper boot.
Important: Use a small flat-bladed tool and lift the inner edge caliper boot next to the piston to release any trapped air.
2. Ensure that the piston boot is below the level of the piston face.
3. Install the caliper.
4. Perform the following procedure before installing the caliper guide pin bolts (115 Series pickups only).
4.1. Remove all traces of the original adhesive patch.
4.2. Clean the threads of the bolt with brake parts cleaner or the equivalent and allow to dry.
4.3. Apply Threadlocker GM P/N 12345493 or Red LOCTITE TM #272 to the threads of the bolt.
5. Install, but do not tighten the caliper guide pin bolts (15 series pickups).
6. Install, but do not tighten the caliper guide pin bolts (15/25 series utilities, 25/35 series pickup).
Notice: Refer to Fastener Notice in Service Precautions.
7. Tighten the caliper guide pin bolts.
^ Tighten the caliper guide pin bolts to 42 Nm (31 lb ft) (115 series).
^ Tighten the caliper guide pin bolts to 108 Nm (80 lb ft) (25 series).
8. Remove the rubber cap or plug from the exposed brake hose fitting end.
Important: Install NEW copper brake hose gaskets.
9. Assemble the NEW copper brake hose gaskets and the brake hose inlet fitting bolt to the brake hose.
10. Connect the brake hose at the caliper by installing the inlet fitting bolt.
^ Tighten the inlet fitting bolt to 45 Nm (33 lb ft).
11. Bleed the hydraulic brake system.
12. Install the tire and wheel assembly.
13. Remove the safety stands.
14. Lower the vehicle.
15. Fill the master cylinder reservoir to the proper level with clean brake fluid.