Wheel Drive Shaft Inner Joint and Seal Replacement
Wheel Drive Shaft Inner Joint and Seal Replacement^ Tools Required
- J 8059 Snap Ring Pliers
- J 35910 Seal Clamp Tool
- J 36652-98 Split Plate Swage Clamp (K1 5 models)
- J 36652-1 Split Plate Swage Clamp (K25 models)
Disassembly Procedure
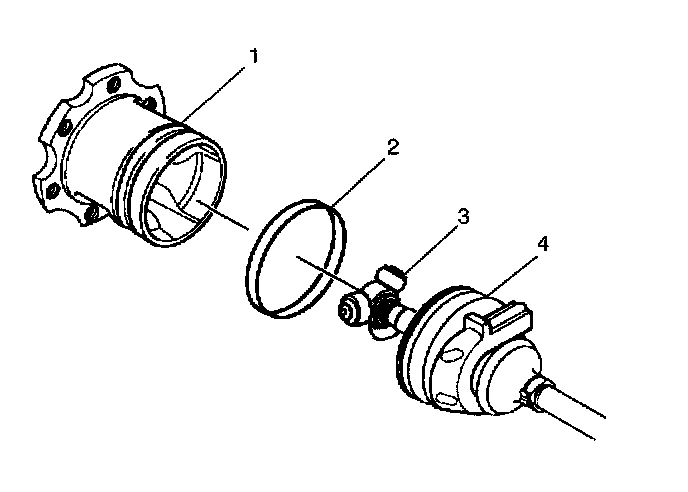
Notice: Do not damage the tri-pot housing (1).
Important: With removal of the halfshaft for any reason, the transmission sealing surface (the tri-pot male/female shank of the halfshaft) should be inspected for corrosion. If corrosion is evident, the surface should be cleaned with 320 grit cloth or equivalent. Transmission fluid may be used to clean off any remaining debris. The surface should be wiped dry and the halfshaft reinstalled free of any buildup.
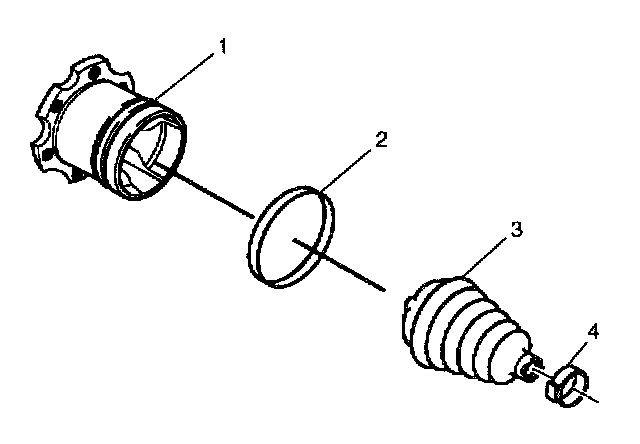
1. Use a hand grinder in order to cut through the swage ring (2).
2. Remove the tri-pot housing (1) from the halfshaft.
3. Wipe the grease off of the tri-pot assembly roller bearings and the tri-pot housing (1).
4. Thoroughly degrease the tri-pot housing (1).
5. Allow the tri-pot housing (1) to dry prior to assembly.
Important: Handle the tri-pot spider assembly with care. Tri-pot balls and needle rollers may separate from the spider trunnion if the tri-pot balls and needle rollers are not handled carefully. Use side cutters to cut away the small seal clamp.
6. Compress the tri-pot seal (4) up the halfshaft, away from the tri-pot spider assembly toward the outboard (CV joint assembly) end of the halfshaft.
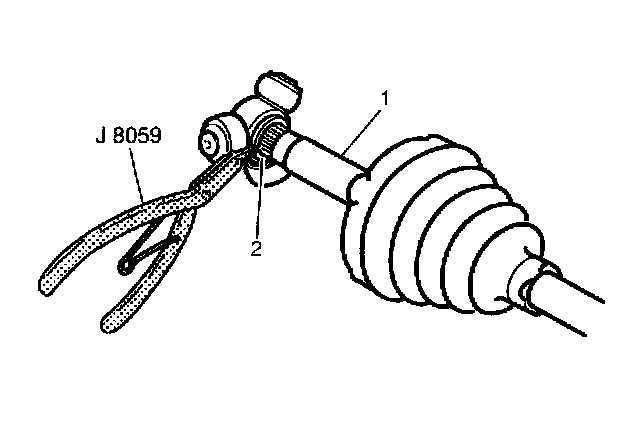
7. Spread the spider spacer ring (2) with J 8059 (or equivalent).
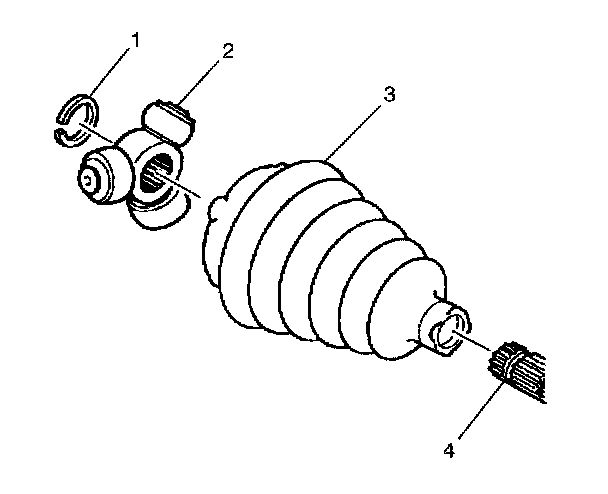
8. Remove the following items from the halfshaft bar:
8.1. The spacer ring (1)
8.2. The spider assembly (2)
8.3. The tri-pot seal (3)
9. Clean the halfshaft bar (4). Use a wire brush in order to remove any rust in the seal mounting area (grooves).
10. Inspect the needle rollers, needle bearings, and trunnion. Check the tri-pot housing for unusual wear, cracks, or other damage. Replace any damaged parts.
Assembly Procedure
1. Place the new small seal clamp (2) onto the small end of the joint seal (1). Compress the joint seal (1) and small seal clamp (2) onto the halfshaft bar.
2. Position the small end of the joint seal (1) into the joint seal groove (3) on the halfshaft bar.
Notice: Refer to Fastener Notice in Service Precautions.
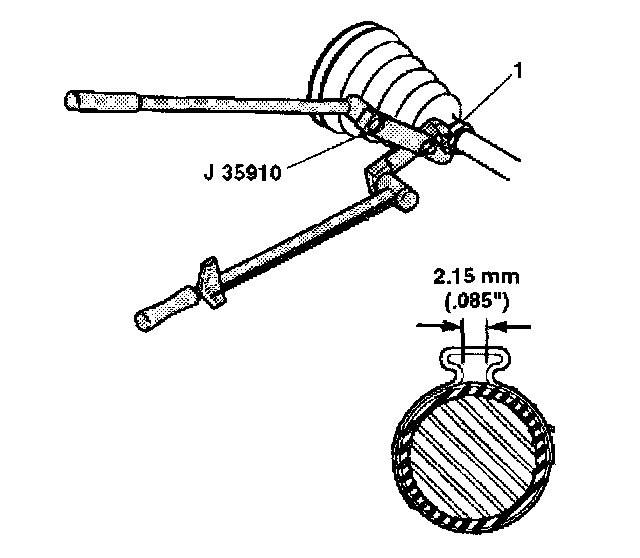
3. Secure the small seal clamp (1) with J 35910 (or equivalent), a breaker bar, and a torque wrench.
^ Tighten the small seal clamp (1) to 136 Nm (100 ft. lbs.).
4. Check the gap dimension on the clamp ear. Continue tightening until the gap dimension is reached.
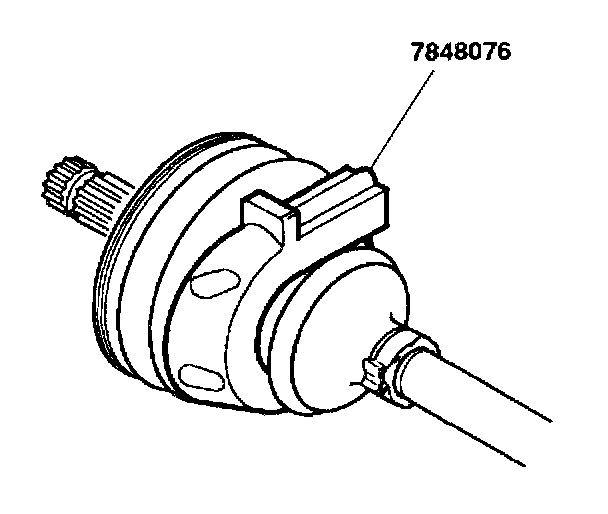
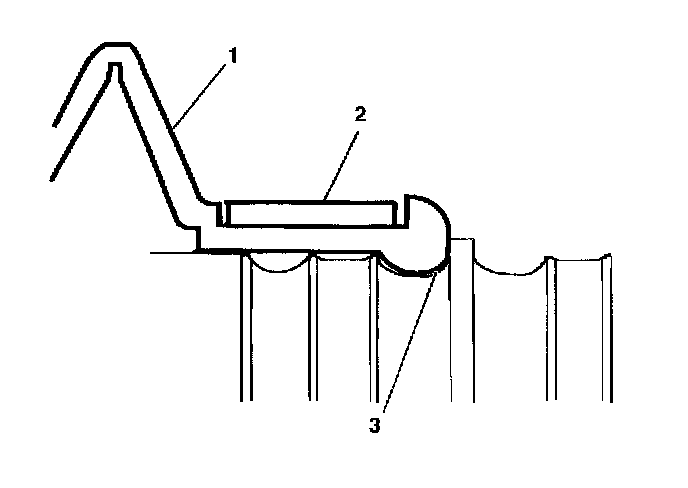
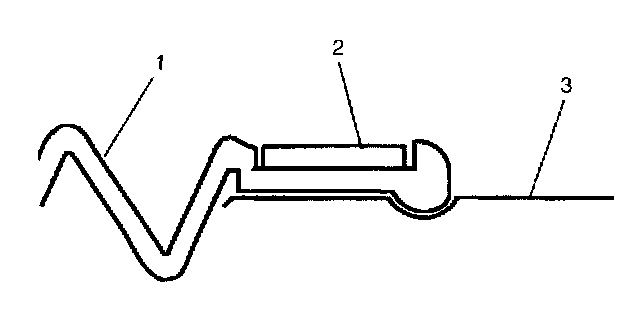
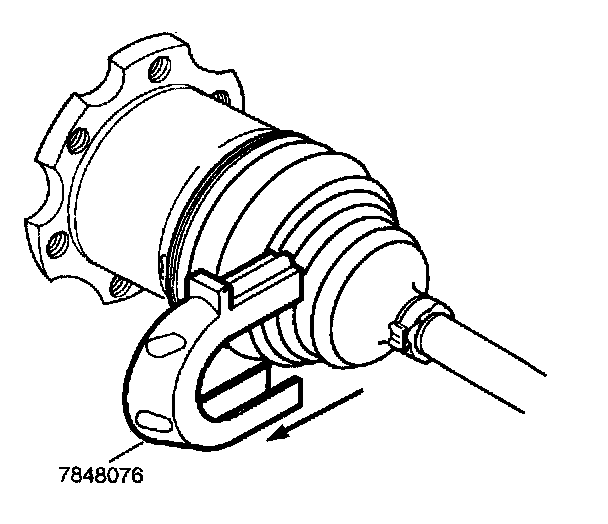
Important: Assemble the CV joint with the convolute retainer in the correct position, as illustrated.
5. Install the convolute retainer over the inboard joint seal, being sure to capture three convolutions.
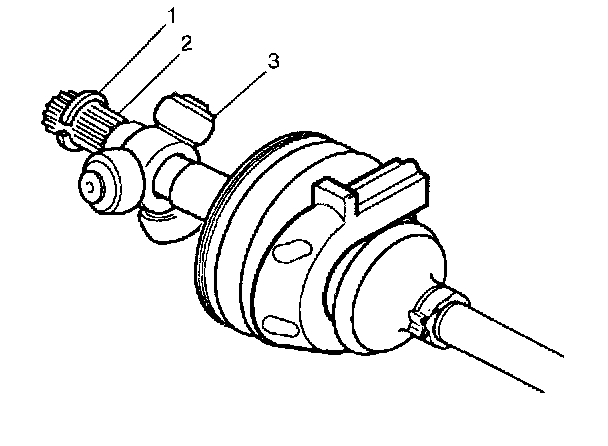
6. Install the tri-pot spider assembly (3) onto the halfshaft bar (2) with the counterbore towards the end of the halfshaft bar (2).
7. Install the spacer ring (1) in the groove at the end of the halfshaft bar (2).
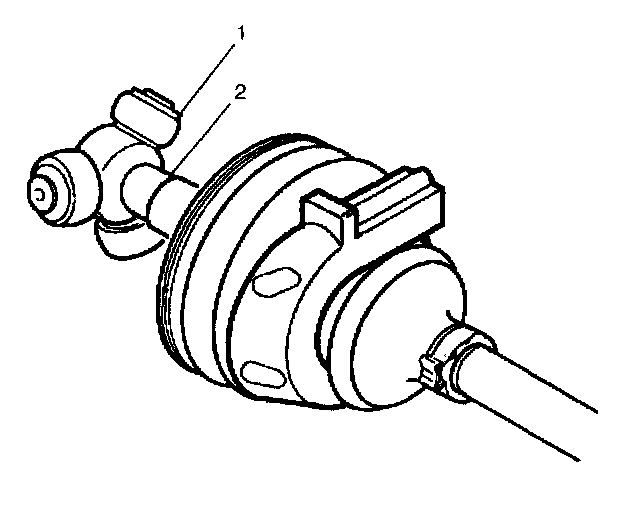
8. Push the spider assembly (1) back toward the end of the halfshaft bar (2) until the spacer ring is covered by the spider assembly (1) counterbore.
9. Pack the tri-pot seal (4) and the tri-pot housing (1) with the grease supplied in the kit. The amount of grease supplied in this kit has been pre-measured for this application.
10. Reassemble the tri-pot housing and the tri-pot seal using the following procedure:
10.1. Pinch the swage ring (2) slightly by hand in order to distort it into an oval shape.
10.2. Slide the distorted swage ring (2) over the large diameter of the seal.
10.3. Place the tri-pot housing over the spider assembly.
10.4. Install the seal onto the tri-pot housing.
10.5. Align the tri-pot seal (1), with the swage ring (2) in place, over the flat area on the tri-pot housing (3).
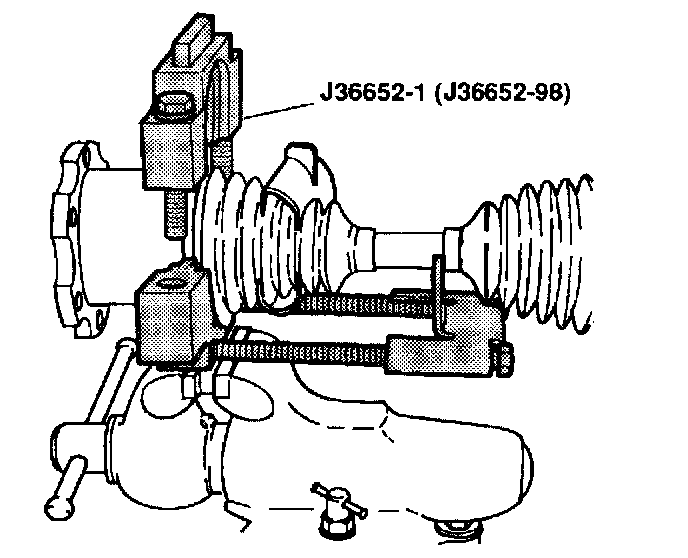
11. Mount J 36652 in a vise.
12. Install the bottom half of the split-plate swage clamp. For K1 5 models, use J 36652-98.
13. For K25 models, use J 36652-1.
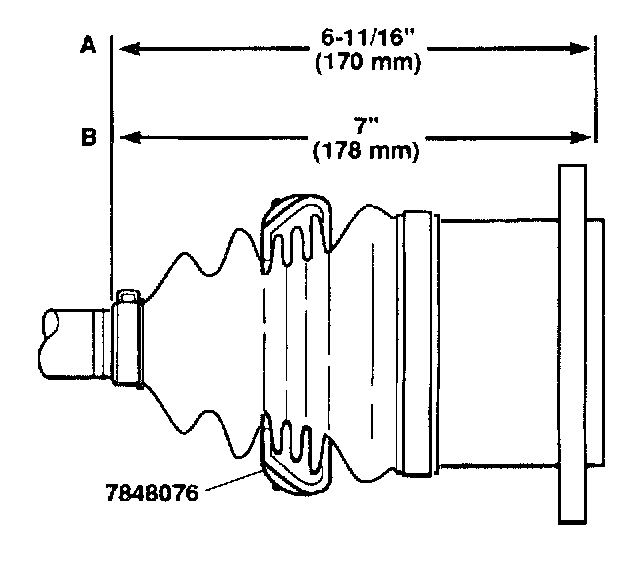
14. Check the inboard stroke position.
^ Use measurement A for the K1 5 models.
^ Use measurement B for the K25 models.
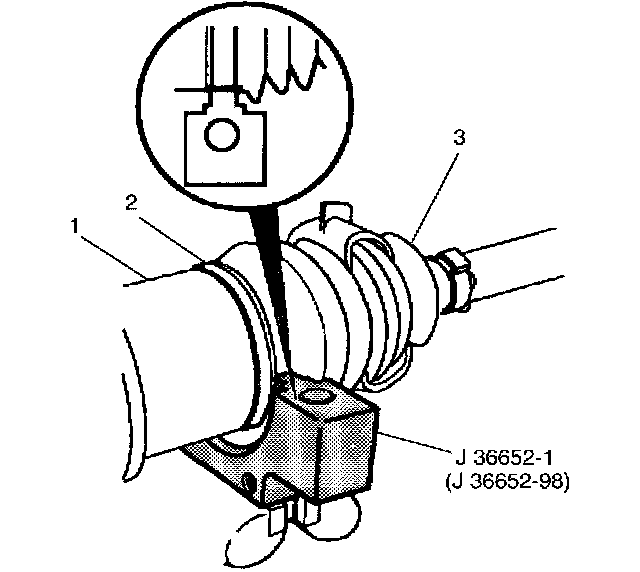
15. Position the inboard end (tri-pot end) of the halfshaft assembly in J 36652.
16. Install the top half of the proper size tool on the lower half of the tool. For K1 5 models, use J 36652-98.
17. For K25 models, use J 36652-1.
18. Align the swage ring (2) and the swage ring clamp.
19. Insert the bolts.
^ Hand tighten the bolts in J 36652 until the bolts are snug.
Important: Align the following during this procedure:
^ The tri-pot seal (3)
^ The housing (1)
^ The swage ring (2)
^ Tighten each bolt 180 degrees at a time. Alternate between the bolts until both sides of the top half of J 36652 touch the bottom half of the J 36652.
20. Loosen the bolts and remove the halfshaft assembly from J 36652.
21. Remove the convolute retainer from the seal.