Air Injection Vacuum Control Solenoid Valve: Service and Repair
REMOVAL PROCEDURE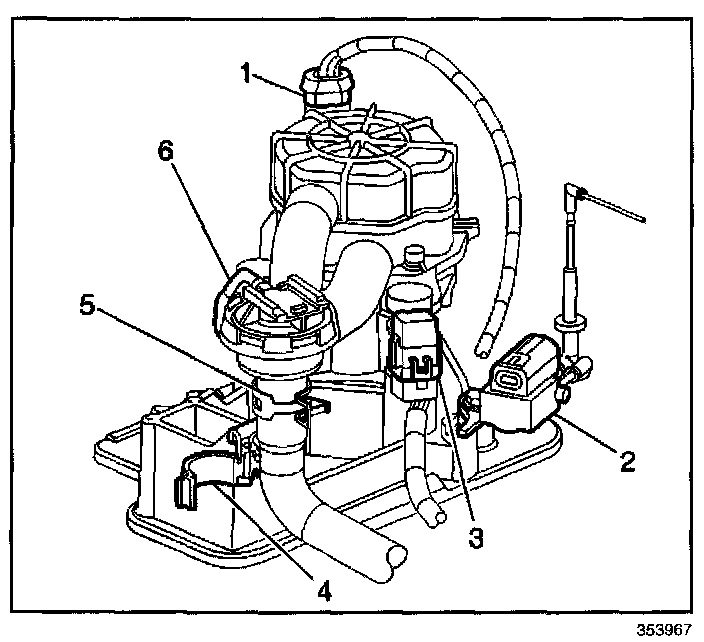
1. Disconnect the AIR solenoid (2) electrical connector.
IMPORTANT: Observe the position of the vacuum lines. The vacuum source point is on the same side as the mounting bracket
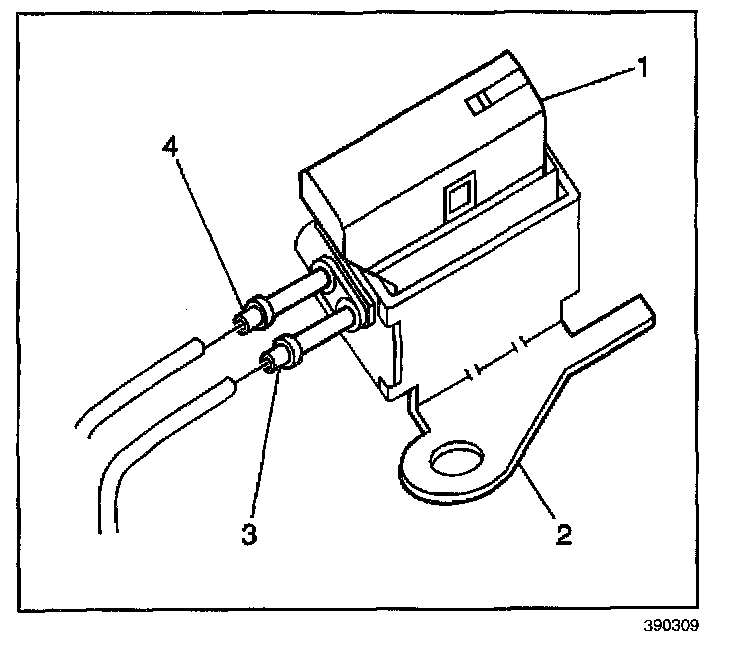
2. Remove the vacuum hoses from the AIR solenoid vacuum ports (3, 4).
3. Remove the fastener securing the AIR solenoid mounting bracket (2) to the base.
4. Remove the AIR solenoid (1).
INSTALLATION PROCEDURE
1. Install the AIR solenoid.
2. Apply GM Threadlocker P/N 9985773 or equivalent to the threads of the fastener.
NOTE: Refer to Fastener Notice in Service Precautions.
3. Install the fastener securing the AIR solenoid mounting bracket to the base. Ensure the locating tab on the mounting bracket (2) is seated properly.
Tighten
Tighten the AIR solenoid mounting fastener to 4 N.m (35 lb in).
4. Install the vacuum hoses to the AIR solenoid vacuum ports (3, 4).
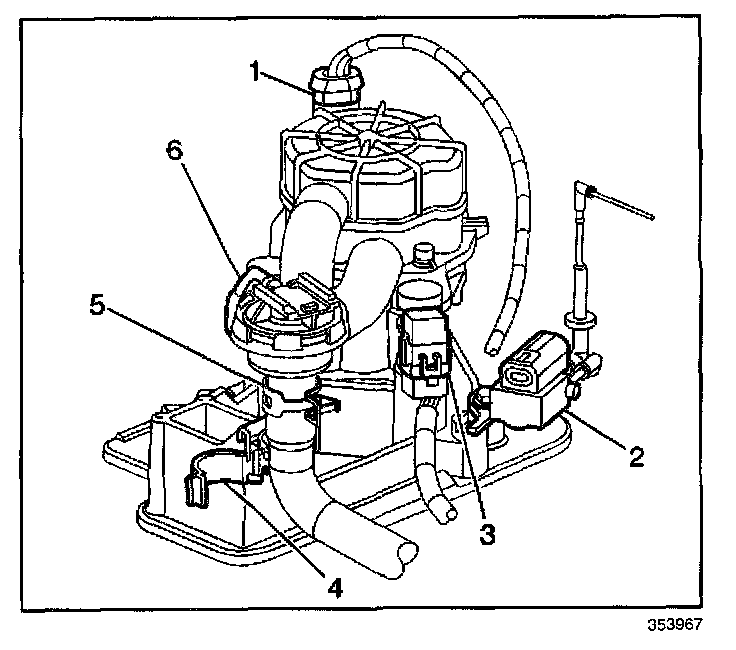
5. Connect the AIR solenoid (2) electrical connector.